The SoundLink® Air system requires a connection to your Wi-Fi® network to receive AirPlay® streamed audio. The following steps guide you through the preferred method for setting up your system. You will need your remote control and the supplied USB cable for this set up. To set up your system, follow these steps:
Setting up your system (video included)
Applies to:
On your computer, open a browser and go to www.Bose.com/wifisetup
For your convenience, the URL is written on the product label located on the bottom of the system
Make sure the SoundLink® Air is connected to power before you continue
Follow the online instructions to download and run the Wi-Fi® setup application
Note: After starting the setup application, you may be asked to install a software driver. Make sure you do this before connecting the SoundLink® Air system to your computer. Do not remove power from the SoundLink® Air system while downloading and running the Wi-Fi® setup application.
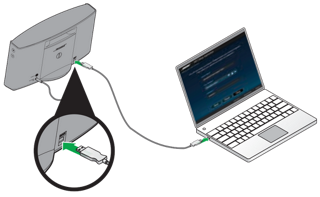
When prompted by the following image, connect the system to your computer using the supplied USB cable

In the setup window, enter the requested information:

"Speaker name" – This field displays the system name "Bose SoundLink Air." We recommend that you select the "Speaker name" and change it to something that helps you identify it better, such as "Living Room SoundLink Air." This is the name that will appear in the list of available devices on your AirPlay® compatible device
"Select your Wi-Fi network" – This field should display the name of your wireless network. If you have more than one, click the downward triangle and select the network you want from the drop-down list. If your network name does not appear in the list or it is hidden, select "Other" from the drop down list and manually set up your network
"Enter your network password" – If you are using a secured network, enter your password
Click "Connect." A progress screen is displayed while the system works on connecting. This may take up to three minutes. You may cancel at any time during the process. If it fails to make a connection, make sure your network name and password are correct and try again
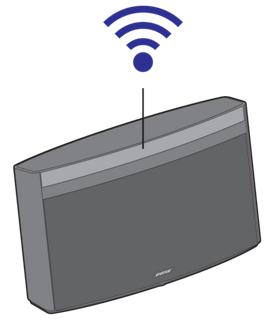
After the initial setup, you can move the SoundLink® Air system to any location within the range of your Wi-Fi® network. Remove the power cable from the AC outlet, move the system and plug it in again. The Wi-Fi® indicator will start blinking blue as the system works on automatically connecting to your network again. When connected, the system will emit a tone and the Wi-Fi® indicator will be solid blue.
Note: If you change anything in your Wi-Fi® network, or move the system to a location where it is within the range of a different Wi-Fi® network, you will need to run the setup application again. When you move it back to within range of your original network, the system will automatically connect without needing to run the setup application again. The system remembers the last four Wi-Fi® networks used.